Getting Started with Pastrata
Accepting invitations, passwordless authentication with magic links and passkeys, and unit verification.
Welcome to Pastrata! Pastrata is your building’s unified community, governance, maintenance, and resident operations platform. Whether you are an owner, tenant, council member, or property manager, this guide helps you activate your account, verify your unit residency, and set up secure sign-in.
Required Roles & Capabilities
Access to these features depends on your building role and assigned capabilities:
| Capability | Description | Default Roles |
|---|---|---|
VERIFICATION_VIEW | View verification queue | PROPERTY_MANAGEMENT |
VERIFICATION_MANAGE | Approve/reject verifications | PROPERTY_MANAGEMENT |
USER_INVITE | Invite users to building | PROPERTY_MANAGEMENT, STRATA_COUNCIL |
USER_MANAGE | Update, deactivate, reactivate users | PROPERTY_MANAGEMENT, STRATA_COUNCIL |
ROLE_GRANT_SC | Grant Strata Council role | PROPERTY_MANAGEMENT, STRATA_COUNCIL |
ROLE_GRANT_PM | Grant Property Management role | PROPERTY_MANAGEMENT |
ROLE_GRANT_CONCIERGE | Grant Concierge role | PROPERTY_MANAGEMENT, STRATA_COUNCIL |
ROLE_REVOKE | Revoke manager roles | PROPERTY_MANAGEMENT, STRATA_COUNCIL |
DIRECTORY_VIEW | View resident directory | PROPERTY_MANAGEMENT, STRATA_COUNCIL |
AUDIT_LOG_VIEW | View audit logs | PROPERTY_MANAGEMENT, STRATA_COUNCIL |
UNIT_MANAGE | Create and update units | PROPERTY_MANAGEMENT, STRATA_COUNCIL |
MANAGEMENT_DASHBOARD | Access management dashboard | PROPERTY_MANAGEMENT |
BUILDING_DATA_IMPORT | Import data from external PMS | PROPERTY_MANAGEMENT, STRATA_COUNCIL |
EXTENSION_MANAGE | Install and manage extensions | PROPERTY_MANAGEMENT, STRATA_COUNCIL |
CHANNEL_CREATE | Create channels | All Verified Members |
CHANNEL_VIEW | View channels | All Verified Members |
MESSAGE_VIEW | View own direct messages | All Verified Members |
NOTICE_MANAGE | Send and manage notices | PROPERTY_MANAGEMENT, STRATA_COUNCIL |
FEED_MODERATE | Moderate community feed (delete posts/comments, pin, close polls, view voters, handle reports) | PROPERTY_MANAGEMENT, STRATA_COUNCIL |
FEED_SUGGESTIONS_VIEW | View community feed post suggestions | All Verified Members |
NOTICE_VIEW | View building notices | All Verified Members |
Quickstart (Getting Started)
- Open your email invitation and select Join Building to start your registration.
- Verify your full legal name, contact email address, and mobile phone number.
- Choose your primary login method: instant Magic Link or biometric Passkeys (Touch ID / Face ID).
- Claim your unit number and select your residency status (Owner-Occupant, Landlord, or Tenant).
- Upload verification proof if required by your building council, then access your community dashboard.
Step-by-Step Guides
How to Sign In Using Passwordless Magic Links
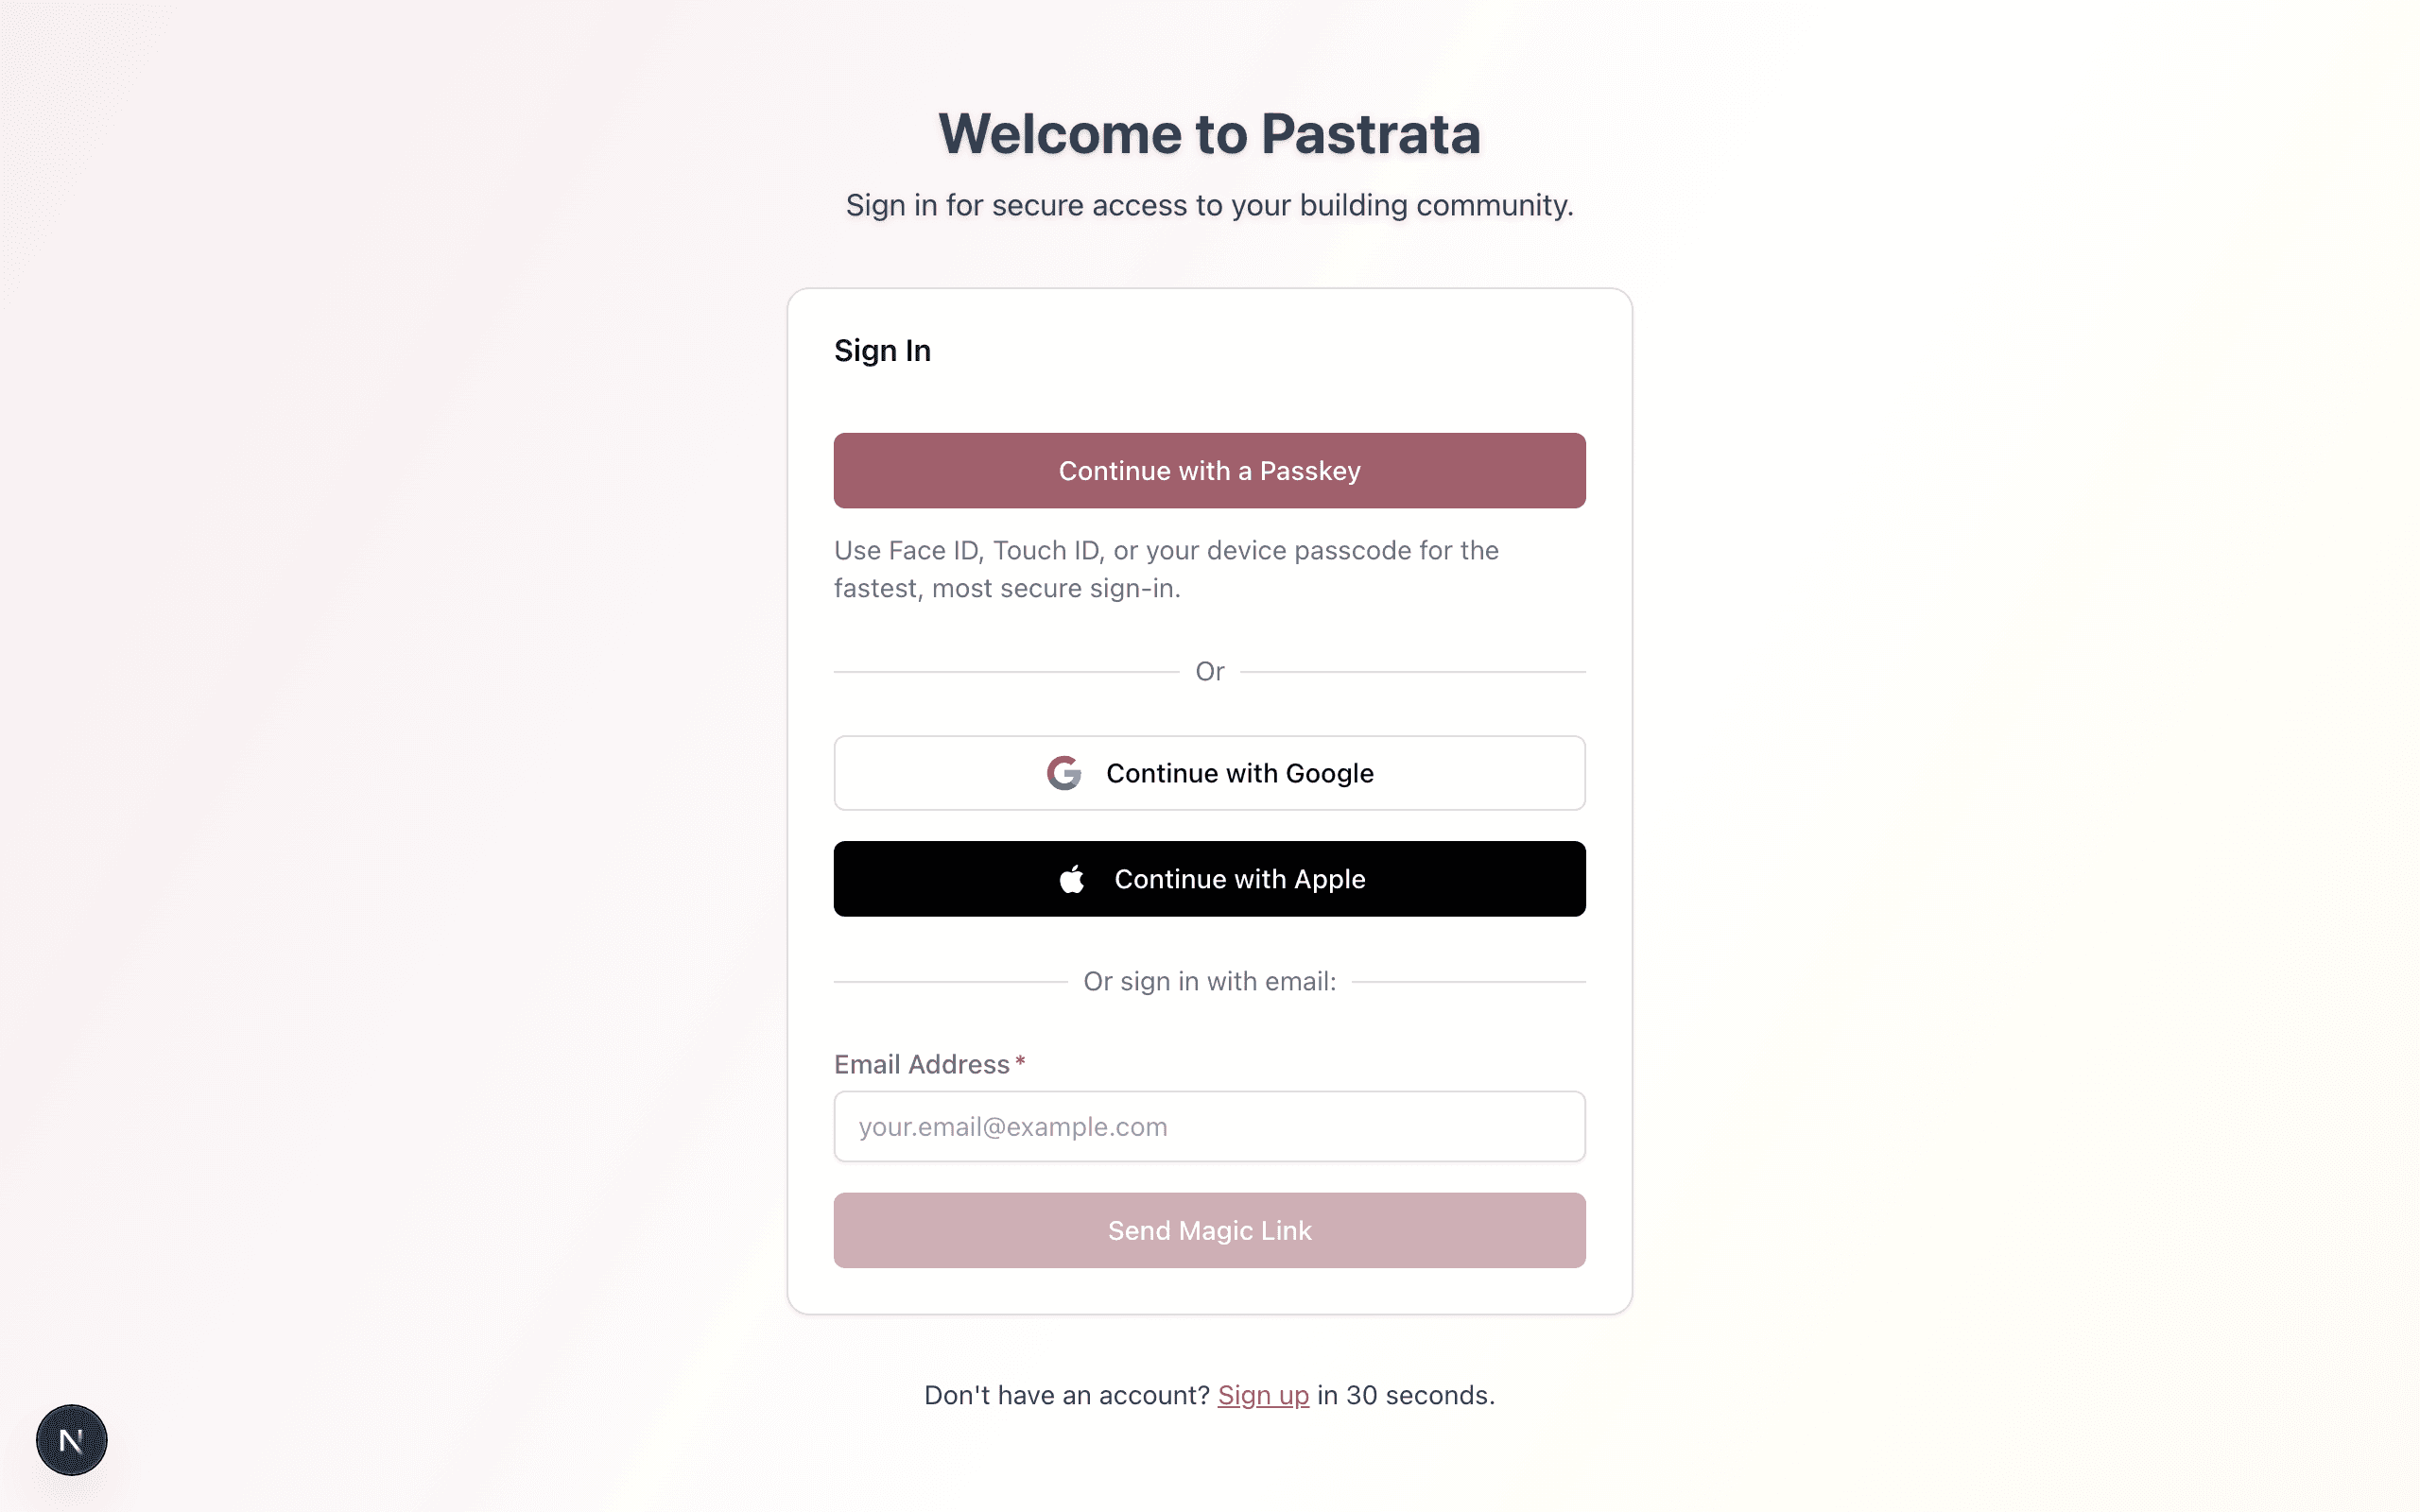
Pastrata uses secure, passwordless authentication to protect building accounts from phishing.
- Visit your building’s Pastrata login page.
- Enter your registered email address and click Send Magic Link.
- Open your email inbox and click the Sign In to Pastrata button.
- You will be instantly logged in without needing to remember or type a password.
Pro-Tip: Magic links expire after 15 minutes and can only be used once for security.
How to Register Biometric Passkeys (Touch ID / Face ID)
Log in with a single touch or glance using your device’s built-in biometrics.
- Log into Pastrata and navigate to Account Settings.
- Under Security & Authentication, select Add Passkey.
- Follow your device prompt to verify your fingerprint, Face ID, or PIN.
- Next time you sign in, simply click Sign in with Passkey for instantaneous access.
How to See Where You Are Signed In and Sign Out Other Devices
If you lose a phone or forget to sign out of a shared computer, end its access from any other device.
- On the web, open your Profile and select the Security tab. In the mobile app, open Profile.
- Under Active sessions, review the list. Each entry shows the device (for example, "Chrome on Windows" or "Pastrata app on iOS"), when it was last active, and when it signed in. The device you are using is marked This device.
- Select Sign out next to a device you don't recognise or no longer use, and confirm. That device is signed out right away.
- To end every session at once, including the one you are using, select Sign out everywhere and confirm. You will need to sign in again.
How to Claim and Verify Your Unit
Link your user profile to your physical apartment, townhouse, or commercial lot.
- Click My Unit in the left sidebar or profile menu.
- Select your building name and unit number from the dropdown list.
- Select your occupancy role: Owner-Occupant, Non-Resident Landlord, or Tenant / Resident.
- If required by strata bylaws, attach a PDF or image of your tenancy agreement or land title certificate.
- Click Submit for Verification. Building managers or council will review your request promptly.
How to Switch Between Multiple Buildings or Units
If you own or manage properties in several strata corporations, switch seamlessly between them.
- Click the building selector dropdown at the top of the navigation bar.
- Select the building or unit you wish to manage or view.
- All notices, documents, bookings, and financial ledgers will instantly refresh for the selected building.
How to Open Your Building from a Shared or Shortened Link
Links that point at your building, or at a section of it, always lead somewhere useful.
- Opening your building’s address on its own takes you to your usual starting page: the community feed, or the concierge dashboard if you are a concierge.
- Shortening a page address to a section, such as your account or your unit, takes you to the main page of that section that you can use. For example, owners land on their strata fees and other members on their payment history.
- If a link points at a page that doesn’t exist, you see a Page not found screen with a button back to your building.
How to Archive or Delete a Unit (Property Managers & Council)
Managers with the Create and update units permission maintain the unit roster from Management → Directory.
- Switch the directory to the By unit view and click a unit to open its details drawer.
- Scroll to the Danger zone at the bottom of the drawer.
- To retire a unit that is no longer in service, click Archive Unit. Archived units are hidden from pickers and default lists and are left out of strata fees, special levies, and other building-wide charges, but their members and history (including charges they already have) are kept, and you can unarchive them at any time.
- To remove a unit that was created by mistake (for example, a mistyped unit number), click Delete Unit and confirm. Deleting is permanent.
Pro-Tip: Delete Unit only appears for a unit with nothing attached to it — no members (past or present), invitations, charges, ledger activity, requests, or other records. If anything is attached, archive the unit instead.
Pro-Tip: When you add a unit to a member from Edit User, choosing New unit… creates the unit as part of the change. If the number you type already exists, select that unit from the list instead; an archived unit's number can't be reused until the unit is unarchived.
Pro-Tip: Edit User lists every unit the member holds, with its owner/resident role, which is their main unit, and its verification. Add another unit, end one (you confirm first), change one unit's role or make it the main unit. Adding or ending a unit follows your building's approval setting for member changes; changing a role or the main unit applies straight away. You can't change your own units.
Pro-Tip: A person who holds more than one unit is shown as "Units 12, 14" in the directory and wherever members are listed. Residents choose which unit their guest passes and packages are for.
Pro-Tip: When logging a package, the recipient list for a unit includes everyone who holds it, including someone for whom it is a second unit.
How to Invite Someone to the Building (Property Managers & Council)
Managers with the Invite users to building permission can invite new members from Management → Directory.
- In the By person view, click Invite. To invite someone straight into a unit, switch to the By unit view, click the unit, and click Invite to this unit in its drawer.
- Enter the person's email address and, optionally, their name, and tick Owner and/or Resident.
- If you can manage units, choose the person's unit from the list (it is already chosen when you started from a unit's drawer).
- If you can grant manager roles, you can also invite the person as Strata council or Property management. Only the roles you are allowed to grant are offered.
- Click Send Invite.
Pro-Tip: Archived units can't take new members, so they don't appear in the unit list and their drawer has no Invite to this unit button.
Pro-Tip: You can invite someone who is already a member to another unit: accepting adds that unit to their membership, verified. Because the invitation verifies the unit, only managers who can also approve verifications can send it, and if that changes before the person accepts, they are asked to get a new invitation. Where your building requires a second manager's approval for giving a member a unit, the invitation waits for that approval, which the member can't give themselves.
How to Find People Who Aren't Assigned to a Unit (Property Managers & Council)
Managers, concierge staff, and anyone not yet placed in a unit stay visible in Management → Directory in both views.
- In the By unit view, open the No unit group at the top of the list. It shows how many people have no unit and lists them by name. It starts open when your building has no units yet.
- Click View in By person to see all of them in the By person view, where you can edit each person and assign their unit.
- You can also go straight there: in either view, set the Directory gaps filter to People without a unit.
Pro-Tip: Each view shows only the filters that apply to it: Unit status and Sort by in By unit, Role and Verification in By person. When you switch views, any filter that doesn't apply is cleared and a short note tells you which.
How to Manage Your Unit, Members and Invitations with eConcierge
eConcierge can invite people, update members and keep the unit list current for you. Nothing is sent or changed until you confirm.
- Owners: open eConcierge and say what you want for your own unit, for example "Invite my tenant sam@example.com to my unit", "Take Alex off my unit, they moved out" or "Approve my roommate's request to join my unit".
- Managers: ask, for example, "Invite jordan@example.com to unit 305 as the owner", "Resend Riley's invitation", "Cancel the invitation to pat@example.com", "Update Priya's phone number", "Move Tom to unit 503", "Deactivate Morgan, they moved away", "Add unit 108" or "Archive unit 1202".
- eConcierge finds the person, invitation or unit you mean and shows a confirmation card naming them and each change. Adding, archiving or restoring a unit changes the number of units your building is billed for, and the card says so. When your building requires a second manager to approve member changes, the card says so too.
- Confirm to go ahead. It is done as you, exactly as if you had used Management → Directory or your unit page yourself.
Pro-Tip: An owner can only invite people to, remove people from, and verify people in their own unit.
Pro-Tip: These stay in the app: granting or removing manager roles, changing a member's email address, verifying members from their uploaded proof, unit entitlements, deleting units, CSV imports, and approving or rejecting changes another manager made. eConcierge links you to the right screen.
How to Review Proofs and Verify Members in Bulk (Property Managers)
Managers with the Approve/reject verifications permission can work through the verification queue from Management → Directory.
- Switch the directory to the By person view and set the Verification filter to Pending.
- To review one member, open the row's actions menu and choose Verification. Click View next to an uploaded proof: images and PDFs open in a preview inside the dialog, so you can check the document before clicking Mark verified or Reject. Other file types open in a new tab.
- To verify several members at once, tick the checkbox on each row (or Select all on this page), then click Verify in the action bar and confirm.
- To chase people who haven't accepted their invitations, select their rows and click Resend invitations. This needs the Invite users to building permission.
- A member who holds more than one unit has a verification for each unit, shown under their row. Once the member is verified, click Verify unit next to any unit that isn't verified yet. You can't verify your own units, and if your building requires a second manager's approval, the change is sent for approval.
Pro-Tip: Each action button shows how many of your selected rows it applies to. Members who are already verified, and people who haven't accepted their invitation yet, are skipped by Verify. If some rows fail, they stay selected so you can retry just those.
Pro-Tip: If your building requires a second manager to approve verification changes, bulk verify submits each change for approval and tells you how many are waiting.
Pro-Tip: Your own verification is always decided by another manager: if you ask for it, it waits in the approvals queue even where verifications need no approval, and you can't approve it yourself. If you are your building's only manager, it goes through at once, unless your verification was declined: then another manager or Pastrata support must verify you. If your building has other managers but none of them may approve actions, it is refused until one of them is given that permission.
Pro-Tip: Only verified managers approve changes. Until your own membership is verified, the only thing you can submit as a manager is your own verification: you can't approve anything, change other members' details or verification, grant or remove manager roles, or invite people as a manager. Management pages show a note in place of the controls you can't use yet; if you may approve verifications, its Ask to be verified button sends your request to another manager. If a change needs a second manager's approval and none of the other managers is verified yet, it is refused rather than made without approval: get a co-manager verified first, or contact Pastrata support, who can verify a building manager.
Pro-Tip: A manager role can only be given to a verified member, including council officers seated by a council transition: verify them first. Someone you invite into a manager role is verified when they accept.
Pro-Tip: Removing someone's manager role follows your building's approval setting for it: where your building requires a second manager's approval, the role stays until another manager approves. The person it's about can't decide their own removal unless they're the only other manager who could. To move a Property Manager or council member to a lower role, or to one that can't approve management actions, remove their role first, then give the new one.
Pro-Tip: Marking a manager pending, unverified or rejected follows your building's approval setting for verifications, because it stops them approving changes: where your building requires a second manager's approval for verifications, it waits for one.
How to Mute and Manage Conversation Notifications
Control alert frequency and prevent notification fatigue by muting active direct messages or channels.
- Open Messages from the left navigation sidebar or mobile navigation tab.
- Select the direct conversation or channel you wish to mute.
- Click or tap the bell icon in the conversation header (or open Channel Settings / Channel Info).
- Choose your preferred duration: 1 hour, 8 hours, 1 week, or Until I unmute (indefinite).
- While muted, a BellOff icon appears in the conversation list; push and email alerts are silenced while unread message counts continue to update.
- Click or tap Unmute Notifications at any time to resume normal alerts.
How to Check Your Notifications
Everything Pastrata delivers to you in the app collects in your notification inbox, so nothing is missed if a push notification was turned off or never arrived.
- Click or tap the bell icon at the top of the screen. A number on the bell shows how many notifications you haven't read.
- Unread notifications are marked with a dot (on the web, a highlighted edge). Scroll down and choose Load more to see older ones.
- Tap a notification to mark it read and open what it is about. In the mobile app, a notification from another of your buildings switches you to that building first.
- Choose Mark all as read to clear the unread count, or tap the X on a notification to dismiss it.
Pro-Tip: In the mobile app the inbox shows notifications from all of your buildings, plus account notices such as privacy requests. On the web it shows the building you are viewing.
Pro-Tip: Choose which notifications reach you, and how, under Settings › Notifications.
Pro-Tip: In the mobile app, the Push notifications switch on your profile applies to your whole account: turning it off stops push notifications on every phone you use, and the choice stays if you reinstall the app or sign in on a new device. Email and your notification inbox are not affected.
How to Message People and Change Notifications with eConcierge
eConcierge can send messages and change your notification settings for you. Nothing is sent or changed until you confirm.
- Open eConcierge and say what you want, for example "Message Priya and tell her the parcel is at my door", "Mute the move-in group chat until Monday", "Start a gardening club channel with Priya and Tom", "Stop push notifications for community posts", "Send my daily digest at 7am" or "Mark all my notifications as read".
- eConcierge finds the people, conversation, channel or notification category you mean and shows a confirmation card with what it will do.
- Confirm to go ahead. The message is sent as you, exactly as if you had typed it in Messages.
Pro-Tip: eConcierge sends text only. Add photos or files, unsend a message, or delete a channel from Messages yourself.
Pro-Tip: It can rename group conversations and channels and add or remove people, leave them, and mute or unmute them. Creating and changing channels follows the same permissions as the app.
Pro-Tip: The account-wide Push notifications switch and mandatory notification categories can only be changed by you in the app.
How to Post, Vote and Report on the Feed with eConcierge
eConcierge can post to the community feed, comment, vote in polls, report posts and block members for you. Nothing is posted or changed until you confirm.
- Open eConcierge and say what you want, for example "Post that I found a grey cat by the parkade", "Start a poll asking whether the BBQ should be Saturday or Sunday", "Vote Sunday in the BBQ poll", "Comment on the lost cat post that I saw it by the bins", "Report that abusive post" or "Block Tom Becker".
- eConcierge finds the post, comment, poll answer or member you mean and shows a confirmation card that quotes the post and shows exactly what will be posted.
- Confirm to go ahead. It is posted as you, exactly as if you had used the Feed yourself.
Pro-Tip: eConcierge posts text and polls only. Add photos, react with an emoji, or delete a post or comment from the Feed yourself.
Pro-Tip: A complaint about a neighbour, such as noise, goes to management as a request, not as a feed report. Ask eConcierge to "report it" and it files the request.
Pro-Tip: Managers who moderate the feed can also ask it to pin or unpin a post, list reported content, and mark a report actioned or dismissed. Removing the reported content is only done when you ask, and the card says it can’t be undone.
Pro-Tip: On the web, reports wait for review under Management > Communication > Reported Content, shown only to managers who moderate the feed.
How to Use Post Suggestions on the Feed
If you are not sure what to post, the building feed offers ideas to get the conversation going. Suggestions appear only if you can post in your building.
- Open Feed from the left navigation sidebar, or the Feed tab in the mobile app.
- Look for a Need an idea? prompt above the post box, or a Post idea card above the posts. In a quiet building with no posts yet, the idea appears where the posts would be.
- Click or tap Use this idea or Start a post. The post box is filled with sample text you can edit, and the cursor is placed in it. If you had already started writing, your draft is kept.
- Edit the text to make it your own, then click or tap Post.
Pro-Tip: Everyone in a building sees the same ideas on a given day, and new ideas rotate in daily.
How to Pause or Resume an Extension with eConcierge (Strata Council & Property Managers)
Pause an extension your building installed, or turn a paused one back on, by asking eConcierge. Requires the Install and manage extensions capability.
- Open eConcierge and ask, for example, "Which extensions do we have installed?", "Pause the Acme Sync integration" or "Turn Acme Sync back on".
- eConcierge finds the extension and shows a confirmation card naming it and its publisher, and what pausing or resuming does.
- Confirm to pause or resume it. A paused extension gets no building activity and loses its access until it is resumed; its settings, keys and stored data are kept.
Pro-Tip: An extension your management company installed is turned off for your building on its card on the Extensions screen, not through eConcierge.
Pro-Tip: These stay in the app: installing or uninstalling an extension, its settings and secret keys, withdrawing consent to it, connecting or importing the building mailbox, and anything in your management company's organization portal. eConcierge links you to the right screen.
How to Change Your Name with eConcierge
Ask eConcierge to change the name neighbours and managers see on your posts, messages and in the directory.
- Open eConcierge and ask, for example, "Change my name to Priya Shah-Kim".
- eConcierge shows a confirmation card with your current name and the new one. Your name is on your account, so every building you belong to shows the change.
- Confirm to save it.
Pro-Tip: These stay in the app, and eConcierge links you to the right screen: passkeys and signed-in devices (Profile → Security,
/profile/security), your profile photo (Profile → Details,/profile/details), your app language (Settings → Language,/settings/language), and consents, data export and privacy requests (Settings → Privacy,/settings/privacy). In the mobile app, open Profile or Privacy.
Pro-Tip: Deleting your account is done yourself from your profile; eConcierge never deletes an account. The email address you sign in with can only be confirmed or corrected while you join a building; after that, ask your building management or Pastrata support to change it.
Key Concepts & Building Policies
Building Verification Tiers
To protect privacy and physical security, some features (such as voting in council elections, viewing financial balance sheets, and booking elevators) require verified unit membership. Unverified members can browse public notices while their documentation is under review.
Data Privacy
Personal contact details are never shared with other residents without your explicit opt-in in the resident directory. The privacy law that applies where you live (for example, BC’s PIPA, or PIPEDA federally) may give you further rights over your personal information.
Message History Retention
Messages in direct conversations, group conversations, and channels, together with any attached files and photos, are kept for 545 days (about 18 months) and are then permanently deleted. Deleted messages cannot be recovered, so save anything you need to keep (for example, by uploading important files to the document library). A conversation whose messages have all expired disappears from your list; channels remain with an empty history.
Photo Location & Camera Data in Messages
Phone photos usually carry hidden details such as the GPS location where the photo was taken and the camera's model and serial number. When you send a photo in a message, Pastrata removes these details before anyone else in the conversation can open it; the photo itself, including which way up it appears, is unchanged. This happens shortly after the photo has been scanned for malware; until then, other participants see it marked Processing…. If a photo can't be processed (for example, an HEIC photo sent from a computer), it is marked Can't be shown to others on your side and other participants are told it can't be shown; convert it to JPEG or PNG and send it again. You can always open photos you sent yourself.
Frequently Asked Questions & Troubleshooting
What if I did not receive my invitation email?
Check your spam or junk folder for an email from notifications@pastrata.com. If still not found, contact your property manager or strata council to re-send your invitation.
Can multiple people from the same unit join?
Yes. Co-owners, spouses, and roommates can each receive their own individual invitation and verify their residency under the same unit.
Can neighbours see my unit number?
Only if you choose. Your unit number is hidden from other residents by default. To show it next to your name on posts and comments, open your profile, find your building, and turn on Show my unit number to neighbours (on the web, it's under Buildings). You always see your own unit, and your building's managers can always see it.
What can neighbours see when they tap my name?
Tapping a name or photo on a post or comment opens that member's profile card. Neighbours see your name, photo, when you joined the building, any building role you hold (such as Strata Council), and your unit number only if you've turned on Show my unit number to neighbours. Your email, phone number, and whether you own or rent are never shown to neighbours; only you and your building's managers can see them. The card also has a Message button to start a conversation.
How do I delete my account?
Open Delete My Account in the web app. Before you confirm, Pastrata asks you to prove it's you: enter a code we email you, open a link we email you, or sign in again with Google or Apple. Your Google or Apple account must use the same email address as your Pastrata account. Deleting signs you out on every device right away and ends your building memberships.
Can I undo deleting my account?
Yes, for 30 days. Use the reactivation link in the confirmation email to restore your account and sign back in. On a phone with the Pastrata app, the link opens the app. Until then you can't sign in any other way. Your building memberships aren't restored automatically, so ask your building to re-invite you. After 30 days your personal data is permanently erased and the account can't be recovered.
Related Guides
Tenants & Residents Hub
Essential guide for renters: booking amenities, maintenance tickets, community feed, and rent autopay.
Building Settings
What each building setting controls, who can change it, how settings changes interact with manager approvals, and how to review or change settings by asking eConcierge.